

Since the early release of IntelliBroń security suite, ITSEC team deployed Mini PC based sensors to clients, either in production or demo stage. The device is small yet powerful in terms of computing power. There is also yet another from of deployment that we release. A docker packaged system that contains essential software components, ready to be deployed to any Linux based system, be it bare metal or virtual machine.
Then additional questions arise: what if we need something physically smaller than Mini PC? Something that is cheaper, still quite powerful to run the sensor software, smaller size so that it fits into small and medium business typical system network.
The quest of research began
RISC vs CISC
The author threw idea circaa April 2025: we need an alternative device for sensors. Something smaller that mini PC, but neverthless powerful enough. I even imagine that it could be as small as USB thumb drive!
Initial research led the author to various types of embedded devices, but basically it falls into two categories of SBC (Single Board Computer):
- ARM (Advanced RISC Machine) architecture
- RISC-V architecture: a free and open source ISA (Instruction Set Architecture)
All above categories are RISC (Reduced Instruction Set Computing), where AMD and Intel processors which are x86-64 nowadays, are CISC (Complex Instruction Set Computing) architecture type. In layman perspective, RISC architecture demands lesser power consumption, bigger chance for miniaturization while still maintaining complete features just like its CISC counterparts. Popular example of system using RISC architecture are Android mobile phone, majority of Smart TVs and smart watches.
ARM vs RISC-V
Settle with RISC, we have to decide whether we want to go with ARM or RISC-V. We collect some facts about those two architectures and we summarize them as below:
The author specifically has heavy concern toward market adoption. Why? because R&D needs to build products on top of something reliable, something that is already well known in market although not necessarily a majority in market. Looking that ARM has proven track record and widely adopted, we choose to go with ARM. In near future, in case we need further alternative and time allow for deeper research, research could shift focus on RISC-V and try to exploit its open source nature.
Choices of SBC
Now comes the most challenging question: what ARM based SBC we should POC, at least for first kinf of prototype?
We have this list for most popular ARM based SBC (let's call them consumer grade)
Raspberry Pi caught us the most attention simply because it is very well known and you could easily found many resellers who sold it in Indonesia's marketplace and offline market!
But there is slight worry that Raspberry Pi is not really industrial grade. So what are our choices if we lean toward this aspect?
Please be informed that both consumer grade list and industrial grade list are subjectively curated from results of various AI analysis. Your result might be different.
The author randomly check items in industrial grade list and find out that some resellers in Indonesia sold few models of BeagleBone. The rest are quite hard to get in Indonesia. Overseas import is not primary choice right now due to regulations.
That leaves us in consumer grade list. And the quick and obvious choice is: Raspberry Pi!
The Multiverse of Pi
The rabbit hole hasn't ended yet. Raspberry Pi has lots of variants and we want to pick a fair balance between price and performance. It must also have at least one Gigabit ethernet port, WiFi capability (to anticipate sensing into wireless network) and it must be quite fast since running IDS software with hundreds, even thousands of rules is not something easy to digest.
The author puts Zero and Zero 2 into comparison because it has a smaller dimension compared to Pi 4 or 5. Furthermore, it has WiFi only for network connectivity, making it appealing choice for full wireless deployment.
After careful thought that:
- The deployment scenario could involve wireless only, or wired only or both at the same time
- Sensor hardware demands fast processing due to traffic processing.
- To anticipate the further IntelliBroń development in edge side e.g. more feature deployed
The author eliminates Zero and Zero 2. That leaves us Raspberry Pi 4 & 5. And we go with Raspberry Pi 5 for the latest advancements in Raspberry portfolio!
To Make Pi Better
There are several add ons we purchase in addition to Raspberry Pi 5 board itself to local reseller:
- Plastic case: for safety purpose, also we would like to see how Raspberry Pi looks and performs inside the case i.e how the heat goes, or if it fits certain add ons etc.
- SSD: the author thinks that the default micro SD packaged with Raspberry Pi might not be sufficient for tackling I/O load. Thus using SSD is a better option.
- More RAM (16 GB): by default Raspberry Pi 5 only has 2, 4, and 8 GB variants. Very likely would not be sufficient and the author directly choose to go with 16 GB.
Building The System
Unpack & Go
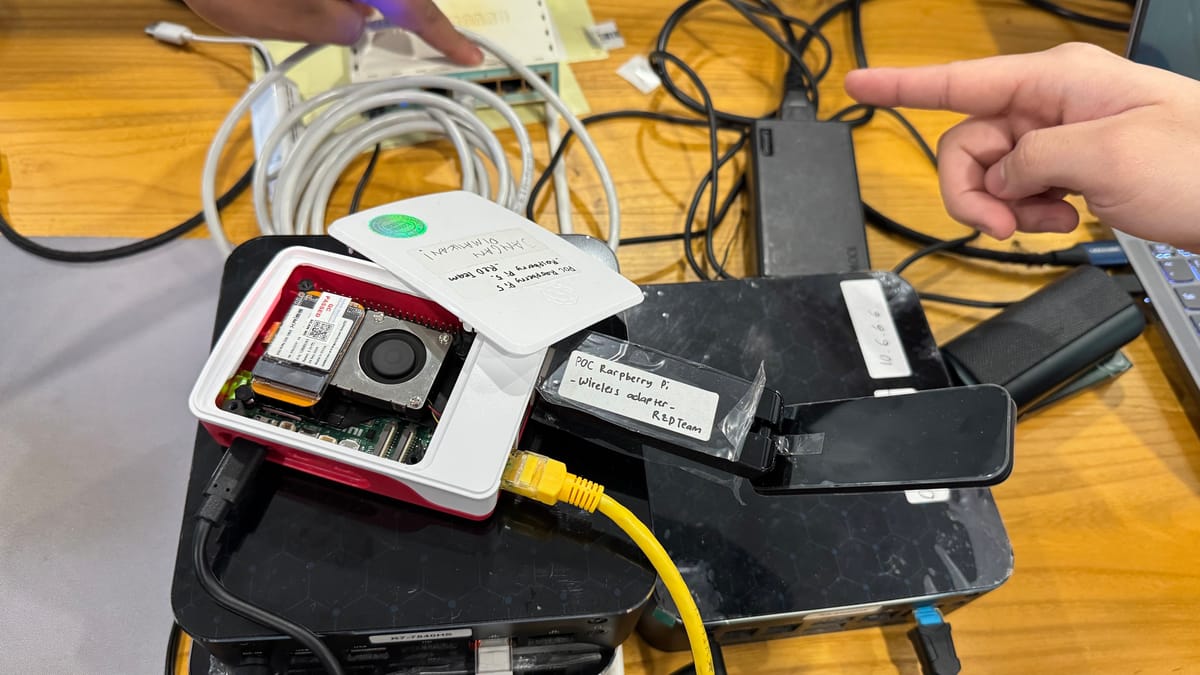
The Raspberry Pi 5 package that arrived in author's desk includes following item:
- Raspberry Pi 5 board, already assembled inside plastic case
- The active cooling and the 128 GB SSD already attached to Raspberry Pi
- HDMI cable
- Power adaptor
- CAT 6 Ethernet cable
Basically a-ready-to-run system, so no need to dabble with screws and pins.
Here is the illustration (not the real hardware we have)

Raspberry Pi OS was already installed and here is the initial display after we turn it on:

From various sources, we found that Raspberry Pi OS (at the time of this writing) is basically customized Debian 12 Bookworm, specifically tuned to make sure Raspberry Pi work optimally.
A really great first impression!
Ubuntu, Assemble!
Raspberry Pi OS was great, but we (R&D team) thought that it would be better if Raspberry uses a common platform we already use in all R&D portfolio, and that is Ubuntu Linux.
We quickly check that there is Ubuntu 24.04 LTS for ARM. In fact, in Install Ubuntu on a Raspberry Pi | Ubuntu it is stated that Raspberry Pi is officially supported.

With such "certified" status from Canonical, we don't need to do a compatibility testing and rest assured that Canonical will make sure every application packaged in Ubuntu repositories has been thoroughly tested and works fine. And we only need to focus in the future to release our in-house developed applications only for this Ubuntu for ARM.
Stress Testing!
We have the hardware, we chose the OS. Now, the question is:
How to make sure it worked under heavy load?
Fortunately, there is an open source software called stress-ng that is able to put maximum load on CPU, RAM, Storage and I/O. After studying the manual page, we decided to go with this configuration:
time stress-ng -v --times --timestamp --sequential 0 -t 300s --log-file /tmp/data.txtExplanation for the options we use:
--sequential 0: we run each tests one test at a time, for example we don't mix and run CPU and RAM testing at the same time.0(zero) as argument means we create N instances of test, where N is the number of CPU cores detected.--times: show the cumulative user and system time spent during the test.--timestamp: for each information/error/warning message shown in screen, prefix them with timestamp-t 300s: run each test item for 300s (5 minutes). Remember the total runtime are the number of tests multiplied by this-tnumber.--log-file: redirect all logs normally shown in console into file. A good choice to have records of your test from time to time.
Readers can read the complete runtime log here: https://drive.google.com/file/d/1c5uRF-dY6Tg163ghuv3-ldK5e1ddZRj9/view?usp=sharing
So to conclude, from the benchmarking (and some also came from author's direct observation):
- When
stress-ngactively working, all 4 cores in Raspberry Pi 5 CPU reach 100% utilization and the kernel maxed the frequency to 2400 Hz - The temperature rise between 75 - 81 degree Celsius in average for all cores during the test. But, Raspberry Pi 5 still working fine uninterrupted until the end of the stress test. The cooling system seems work as expected and the Raspberry seems quite capable to handle such load
- No operating system hung or hardware stall (CPU, memory, disk) observed. We can conclude Debian 12 is quite stable with default settings and a good choice for default OS. The default Desktop environment (which seems based on XFCE or LXDE) also still works normally under high load, even though it stutters a bit during certain operations. Since Ubuntu derived mostly from Debian, we can also conclude that Ubuntu has the same degree of stability as we saw in this test.
- We saw some of the stressor failed runs, e.g:
af-alg,cyclic. But the rest of the stressors runs fine until completion, which refers to overall system ability to run various load without glitch, representing most real world workload.
Based on above results, we can conclude that Raspberry Pi 5 is well rounded choice for embedded system, able to handle high load without too much hassle.
Network Load Testing
We arrive at the final measurement. Raspberry Pi 5 is armed with 1 Gbps Ethernet connection, but:
How fast can this device actually handle?
To answer above question, the author prepares several things:
- Instead of doing loopback traffic testing, the author prefers to set up another machine that acts as a traffic generator.
- To connect between this traffic generator and the Raspberry Pi, the author observed several options: connect to the same WiFi SSID, connect via switch/hub or using direct cable connection. Eventually, the last option was chosen because this is the simples yet reducing connectivity overhead as much as possible.
The final network topology is:
mini pc (10.1.1.2) [1 Gbps port]<-------straight UTP CAT 5 ---------> [1 Gbps port] (10.1.1.1) Raspberry Pi 5The good news is that there is no need to prepare a specially made so-called "cross UTP cable" to connect the two machines. The usual straight UTP would do just fine. The magic lies in the one of the two machines that automatically do the cross connection. And the Raspberry Pi 5 package already includes CAT 6 UTP cable. So simply plug and play ~
As a tool of choice, the author used tcpreplay, an open source to replay a provided PCAP file and send it to the designated network interface of our choice. PCAP itself is a recorded network traffic, either synthetic or coming from real network station.
The PCAP used is: https://share.netresec.com/s/7qgDSGNGw2NY8ea/download?path=%2F&files=maccdc2012_00013.pcap.gz
This file is chosen simply because this is the biggest in size the author can find and the most recent (CCDC only provide up to 2012)
Here is the complete command used to run tcpreplay
sudo tcpreplay --intf1=enp3s0 --mbps=1000 --loop=0 --stats=10 -K ./maccdc2012_00013.pcapShort explanation of the parameters used above:
intf1: interface used to send traffic.tcpreplayhas parameters to send data using primary and secondary, but we only utilizeintf1which utilize only 1 interface as primary traffic sendermbps: the throughput rate you want to achieve (theoritically) in Mbps (megabit per-second)loop=0means loop forever until you press Ctrl+C or other meaning of stopping processstats=10displaytcpreplaytraffic statistics every 10 secondsKto preload the PCAP file entirely to RAM first before sending the data. It should accelerate the data sending in early stage
After approximately running tcpreplay for 10 minutes, statistics show Raspberry Pi 5 only achieve around 742 Mbps!

Surely this isn't what the author hopes. Thus further optimization needed!
After extensive research, the author comes to following recipe:
sudo ethtool -G eth0 rx 4096 tx 4096
sudo ethtool -K eth0 rx off tx off gro off gso off tso off


# put below three lines as /etc/sysctl.d/20-tweak-network.conf
net.core.netdev_max_backlog=10000
net.core.rmem_max=16777216
net.core.wmem_max=16777216

## run
# sysctl --system
## as root to load the above new config

# increase RX buffer
sudo ethtool -G eth0 rx 8192

# install and make sure irqbalance is running to fair balance interrupts accross
# CPU cores
# note: built in eth0 seems has no RSS (Receive Side Scaling), proven by only
# one interrupt servicing eth0 when /proc/interrupts in checked
## cat /proc/interrupts | grep eth0
#### 115:   80086115          0          0          0  rp1_irq_chip   6 Level     eth0

## check with:
## ethtool -k eth0 | grep -i receive
## receive-hashing: off [fixed]
# this proves that receiving hashing is neither on or off, only fixed, so RSS is not present
sudo apt install irqbalance
sudo systemctl enable --now irqbalance

sudo ip link set eth0 promisc on
Raspberry Pi was rebooted to make sure new changes applied smoothly.
The author observed some amount of packet drops, thus we decided to use new PCAP. We use the PCAP from tcpreplay project: https://s3.amazonaws.com/tcpreplay-pcap-files/bigFlows.pcap
We re-ran tcpreplay using revised command:
sudo tcpreplay -i enp3s0 --loop=0 --stats=5 -K -t ./bigFlows.pcapThis time we instead using -t to send traffic as fast as hardware and network drivers allow. And the result is we reached ~ 940 Mbps this time!

Now that's the speed we are looking for! Practically we will never achieve the 1 Gbps due to overhead in the Linux kernel network, thus reaching 930 - 960 Mbps is the maximum threshold in a real network situation.
Conclusion
We have to come to an end here with one satisfying closing: Raspberry Pi 5, although seems like a hobbyist things, with enough tweak and certain add ons, is more than enough to work as a device to tackle tough real world work load. And in our case, this is great beginning to make it as a prototype to move forward with the world of ARM-based embedded systems!